Defining complex filters
You can specify complex filter criteria when you create or modify an exposure view and in other areas of Touchstone.
Some filter fields do not include a list from which you can select a value—click here for a table of valid values in filter fields.
The example in this topic shows you how to create an exposure view that includes data where:
The country is the United States
AND
The state is Florida
AND
The peril is Tropical Cyclone
OR
The state is California
AND
The peril is Earthquake
AND
The contract status is Bound
Procedure
- Open a project.
-
On the Exposure Views tab, click New
 .
The Create New Exposure View pane appears.
.
The Create New Exposure View pane appears. - Select the databases and exposure sets that you want to include in the view.
-
Expand the Filters area (below the grid).

-
Create the filter:
-
In the first filter row, select Country Code is
contained in US.
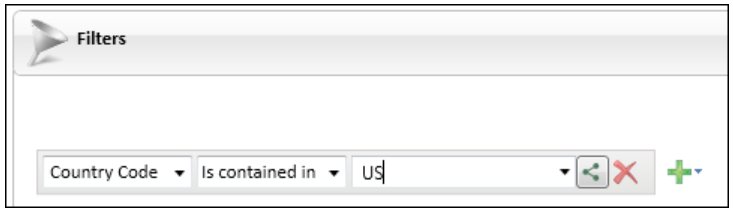
You can select US from the list or type US in the field.
-
Click to create a
new filter row.
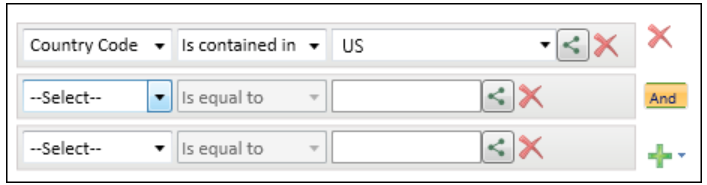
The system adds the And operator.

-
Click again to
create another blank filter row.
You now have a Country Code filter row and two blank filter rows.
-
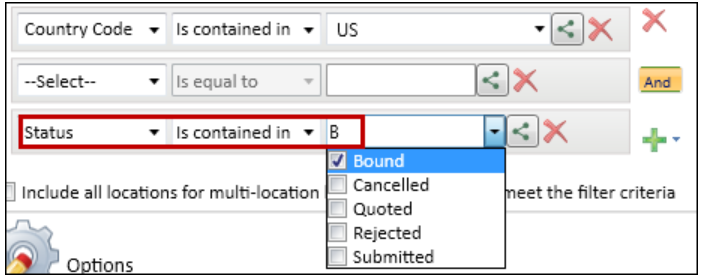
In the third filter row, select Status (in the
Contract section of the list) is contained in Bound
(B).
You now have a Country Code filter (US), AND one blank filter row AND a Status filter (B). This filter includes in the exposure view all contracts in the United States where the status is "Bound".
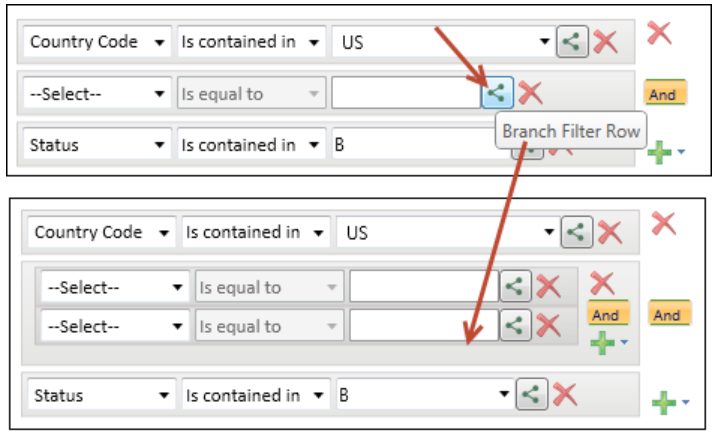
-
In the blank filter row, click Branch Filter
Row.
You now have two blank filter rows, which are slightly indented beneath the Country Code filter row.
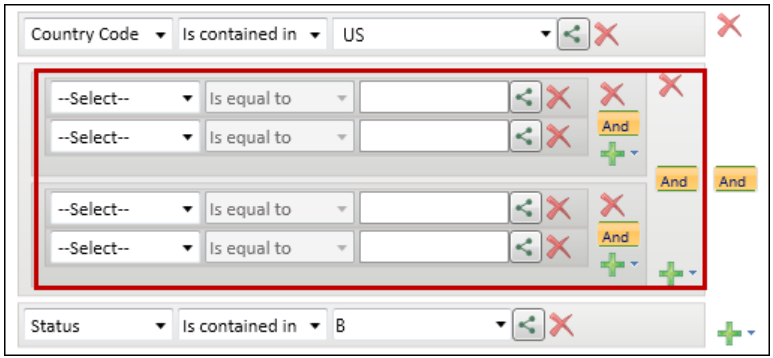
-
In the third blank filter row, click Branch Filter
Row .
You now have an indented block with two sets of blank filter rows.
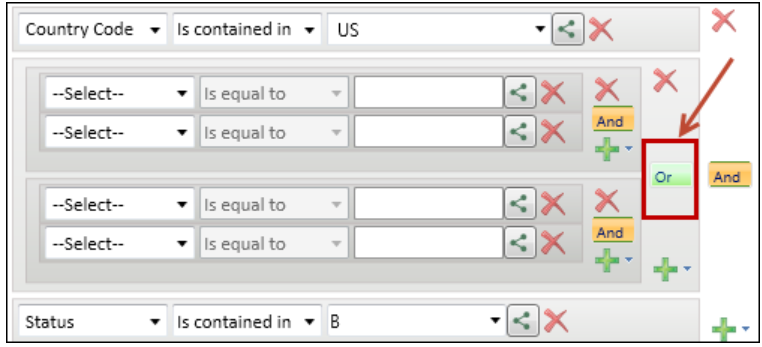
-
In the indented block, click And to change it to
Or.
The Or operator tells the system to include all exposures that satisfy the criteria in the block of four filter rows.
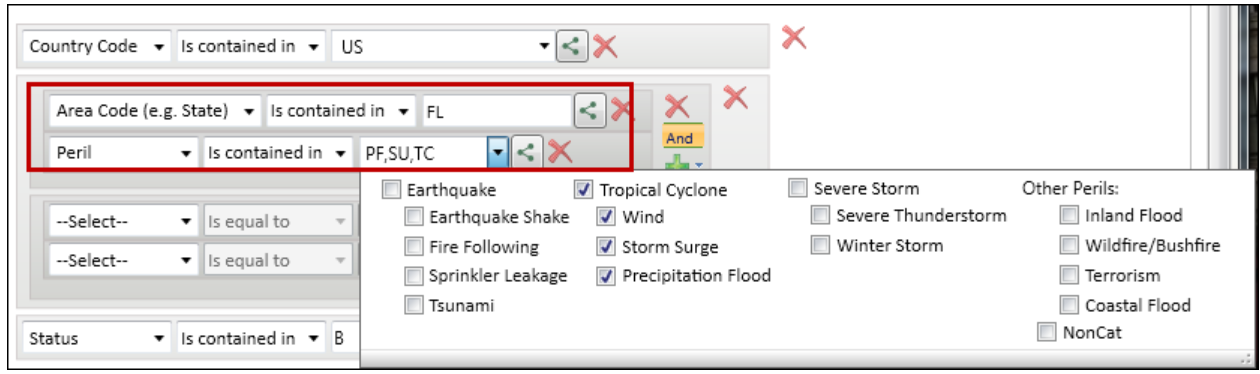
-
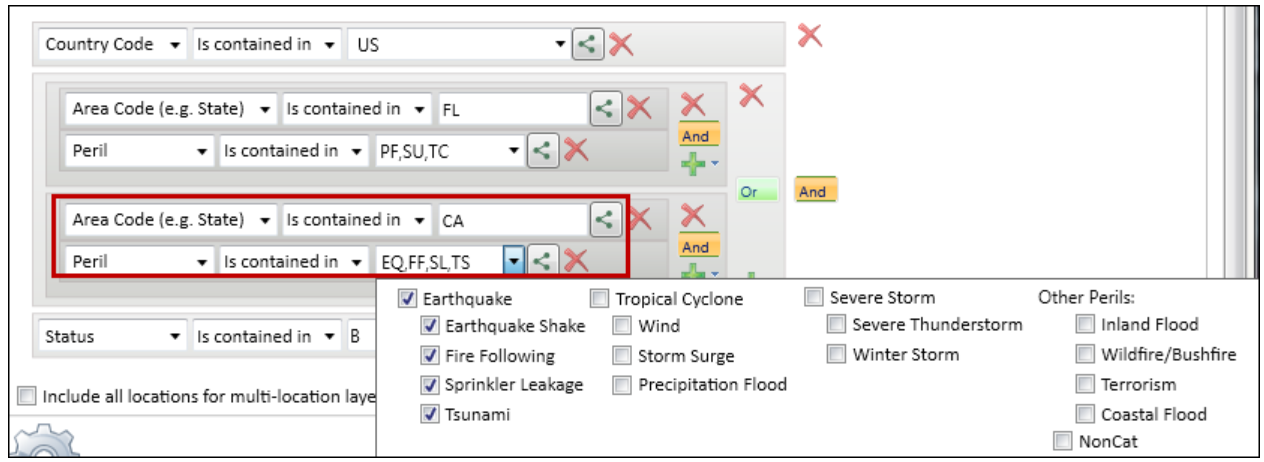
In the first blank filter row, select Area Code is
contained in and enter FL. In the
second blank filter row, in the
Location area, select
Peril is contained in Tropical
Cyclone. (Clear all the other perils.)
The filter tells the system to include all exposures in Florida insured for the Tropical Cyclone peril.
-
In the next blank filter row, select Area Code is
contained in and enter CA. In the
fourth blank filter row, in the
Location area, select
Peril is contained in Earthquake.
(Clear all the other perils.)
These filter rows tell the system to include all exposures in California insured for the Earthquake peril. This is the final filter.
-
In the first filter row, select Country Code is
contained in US.
-
[Optional] Select the Include all locations for multi-location
layered contracts that meet the filter criteria check
box.
If you create a filter that excludes only some locations in a particular contract, this option ensures that all other locations that do not meet the filter criteria, but that are in that contract, are included as part of the exposure view. Using this option avoids non-intuitive analyses. For example, you have a single contract with locations that span the entire East Coast of the United States. You create a filter that includes only locations in New York, and you do not select Include all locations for multi-location layered contracts. The exposure view will contain only locations in New York. For events that make multiple landfalls along the East Coast this could result in inaccurate layer losses for the contract as a whole. However, if you select this option, all additional locations that are in that contract will be included in the analysis, ensuring that the layer losses make sense. The results returned when selecting this option reflect losses to all locations in each contract affected by each event, not just the locations retrieved by the filter you applied. check box.
This can be useful if the Florida locations, in this example, come from a variety of policies and you want to be able to back-allocate policy terms and conditions. (This field does not appear in the Apply Exposure Filter dialog box on the tab.) -
Name the exposure view and then click Create or click
Apply (depending on where you are creating the
filter).
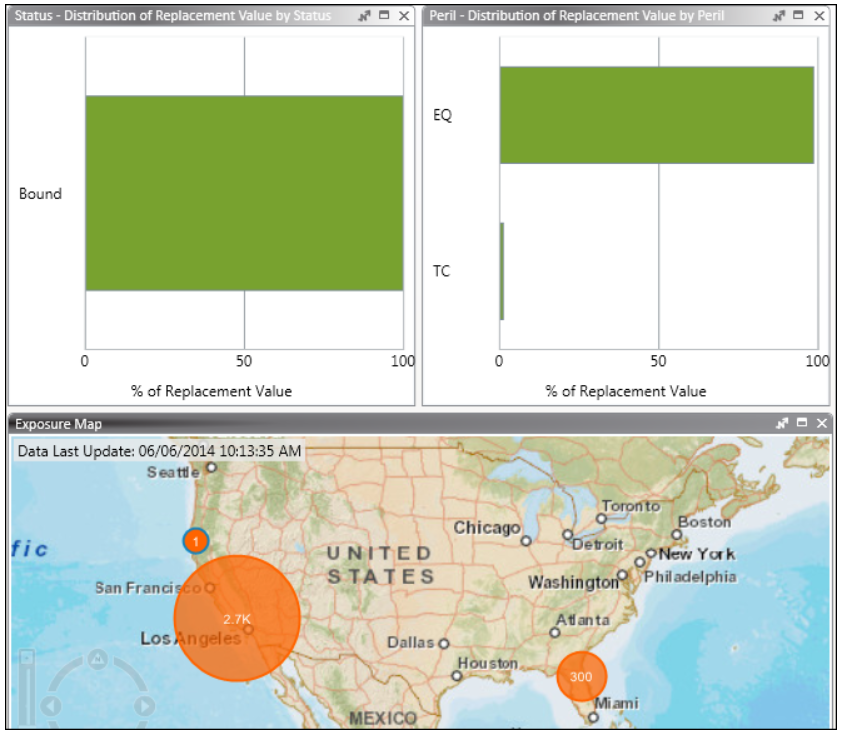
The following image shows the exposure view created by following the preceding steps.