Install the Analysis Server
Steps to install the Analysis Server.
Important: Users seeking to upgrade an existing installation and wishing to retain logs
from activities executed prior to the upgrade should copy the \work\ folders from
Analysis Server nodes to a safe location and then copy them to their original
location after installation.
Procedure
- Verify that you have the necessary prerequisites, as identified in earlier topics.
- Navigate to the application folder where the application setup files are located.
- Run AnalysisServer.exe by right-clicking this file and selecting Run as administrator.
- When presented with the Welcome screen, click Next.
- Select the folder where you would like to install the Analysis Server; if you click Change, choose a destination from the pop-up window.
- Click Next.
- Enter the name and instance of the Touchstone/Touchstone Re database server to which you would like to connect.
- If different than the Touchstone/Touchstone Re database server, enter the name and instance of the Property Exposure database server to which you would like to connect.
- Click Next.
- Enter the name of the Application Server.
- Enter the name of the Analysis Management Server.
- Enter the model data location.
- Click Next.
-
If you are setting up a model share:
- Enter location of the user model share.
- When applicable, enter the location of the Touchstone Re user CLF share.
-
Enter the service account (administrator) user name, password, and domain.
The service account must be defined on the same domain as that used by the servers hosting Touchstone and HPC.
- Click Next.
-
Review your configuration and when satisfied, click
Install. Otherwise, click Back
to return to a previous screen.
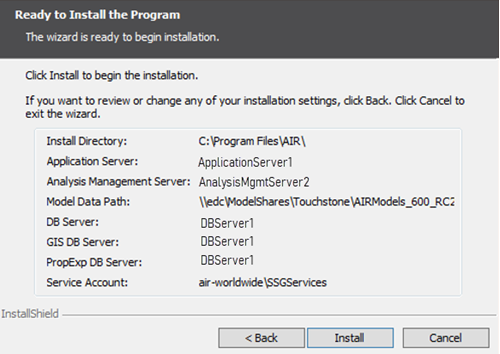
The installation begins.
- When the installation process completes, click Finish.
- If prompted, indicate if you would like to restart your computer.